Getting Started With Ghost
Developing a Ghost blog on your Windows computer is straightforward (and easy!) when you use WSL - Windows Subsystem for Linux.
WSL allows you to run a full Linux distribution of your choice directly within Windows. And you can interact with it, too - You can easily modify files between Linux and Windows and you can view your website as localhost from Windows.
You can be up and running quickly with a ghost development site and not have to install any dependencies on your Windows computer. If you mess up or lose interest all you have to do is just delete the Linux distro and you're back to where you started. You can even export the distro and run it on another computer and everything is intact.
Here are the basic steps:
- Installing Windows Subsystem for Linux.
- Installing Ubuntu.
- Installing Ghost.
- Viewing your Website.
- Administering Ghost.
- Accessing Ghost from Windows.
- Developing or modifying a Ghost Theme.
1. Installing Windows Subsystem for Linux
Before installing a Linux distro you must enable the Windows Subsystem for Linux. You can do this with a PowerShell command or by turning it on in the Control Panel.
Open PowerShell as an Administrator and run:
Enable-WindowsOptionalFeature -Online -FeatureName Microsoft-Windows-Subsystem-LinuxOr type windows features at the Start button search and choose Turn Windows features on or off. This opens the Control Panel. Check the box that says Windows Subsystem for Linux.
For each option you'll have to restart your computer before moving on to the next step and installing Ubuntu.
2. Installing Ubuntu
It really couldn't be simpler:
- Open the Microsoft Store.
- Search for Ubuntu
- Install Ubuntu 20.04 LTS. Or whatever version of Ubuntu you want.
You'll be prompted to create a new user. I usually create a user with the same username and password as my Windows account to make it easier on myself.
Pin Ubuntu to your task bar for easy access. Just click it to open your new Ubuntu distro. Or from a Windows command line just type bash. How cool is that?
It's a good idea to update Ubuntu before you get started:
sudo apt-get update
sudo apt-get upgrade
There's tons of information out there about getting started. Here's a Microsoft link:
3. Installing Ghost
Open your Ubuntu distro. We'll create a directory, install some dependencies, then install Ghost.
- Create a directory for Ghost and update the permissions:
sudo mkdir -p /var/www/ghost
sudo chown <user>:<user> /var/www/ghost
2. Install node.js.
curl -sL https://deb.nodesource.com/setup_10.x | sudo -E bash
sudo apt-get install -y nodejs
3. Install Ghost-CLI. Ghost-CLI is a command line utility that can install and configure Ghost.
sudo npm install ghost-cli@latest -g4. Once Ghost-CLI is installed then you can install Ghost. We're going to install Ghost locally. This install is not suitable for production but is ideally suited for development. Files are cached less, a sqlite database is used instead of a mysql database, and logs go to standard output. (You won't have to restart Ghost every time you modify a file, either. Just when you create them the first time.)
Navigate to the directory you created for Ghost and then run the install. After the install runs it will give you a localhost url to open in Windows. That's it!
cd /var/www/ghost
ghost install local
4. Viewing Your Website
After the install finishes it will give you a url to open. Probably http://localhost:2368. You can type this into your Windows computer's browser to view your new site.
5. Administering Ghost
There are a couple of basic commands that will help you administer your Ghost site. These commands are all executed from your ghost directory.
To start, stop, or restart your site:
ghost restart
ghost start
ghost stop
To view the logs:
ghost logTo view all available commands:
ghost helpYou can read the official ghost documentation for more information.

6. Accessing Ghost from Windows
All of your Linux files and directories are stored somewhere in your AppData directory. But don't go looking for them. You'll find them - but you're not supposed to modify them that way -you'll end up losing your unix permissions.
Here's three ways to access your Linux files safely:
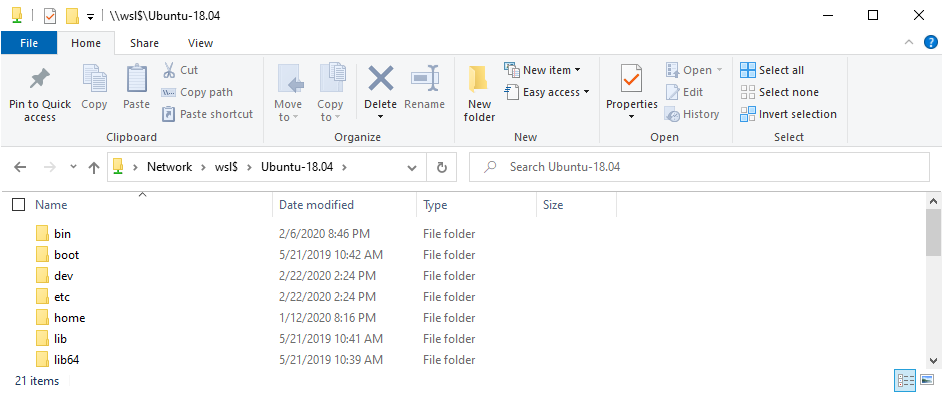
- Type \\wsl$ in your explorer address bar. You'll see your Ubuntu distribution and from there you can see all files and directories. Go to /var/www/ghost to find your Ghost files.
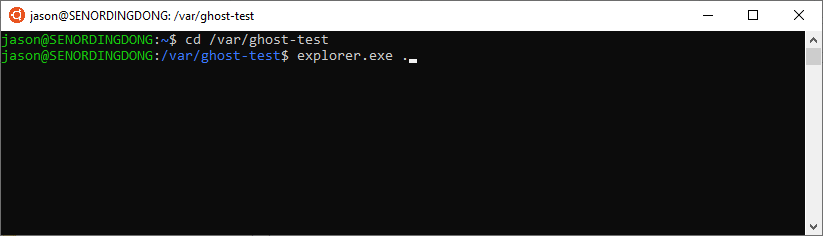
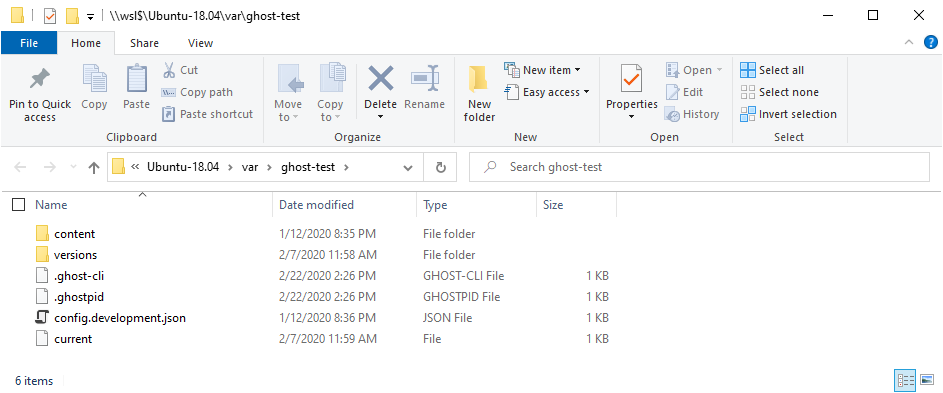
2. This way is my favorite. While in Ubuntu type explorer.exe . and a Windows explorer window will open up at that location. It's such an easy way to access the files.
3. If you use Visual Studio Code there's an extension called "Remote -WSL" that you can search for and add. Visual Studio Code might even automatically recommend it for you when it sees that WSL is installed. If not then just search for it and install it. Then click the green square in the bottom left of Visual Studio Code. It will open a new instance of VSC that has your Ubuntu file system in it.
7. Developing or Modifying a Ghost Theme
When you're getting started it makes the most sense to modify an existing theme. You can play with the Casper theme that it comes with, install one of their other themes, or go searching for a theme.
All themes go in their own directory in the "themes" directory. In our case that's at /var/www/ghost/content/themes/
You can copy the Casper theme to a new directory in the themes directory:
cd /var/www/ghost/content/themes
cp casper my-casper-theme
After you do this you'll have to restart Ghost. In fact, Ghost needs to be restarted anytime you add a file.
ghost restartThen we can tell Ghost to use our new theme by logging into the admin area at http://localhost:2368/ghost/ then clicking on "Design" under "Settings". Your new theme will be listed there with the same name as the casper theme. You can change your theme's name by editing the package.json file. Click it to activate your new theme.
Some themes, like the default Casper theme, need Yarn and Gulp installed. Once installed you can run yarn and it will compile your sass for you - making it easy to modify the css files.
First install Yarn and Gulp:
sudo apt-get install gulp
sudo npm install -g yarn
Then go to your theme directory and install the dependencies and start up yarn:
yarn install
yarn dev
Now anytime you change a css directive in sass it will automatically get compiled for you.
You can check your theme for errors by using gscan:
sudo npm install -g gscan

gscan /var/www/ghost/content/themes/my-casper-theme
That's It!
There's plenty of documentation out there. Start here https://ghost.org/docs/themes/ and have fun. Remember, you can always export your blog data and start over with a brand new Ubuntu installation anytime you want. Go to uninstall programs and you'll see Ubuntu listed there. You can either uninstall it or under "advanced options" you can refresh, which totally resets your install.